stack主题调整

如果不记下来我过两天就会忘记所以不得不……

基础设置

整体

背景

参考【Hugo】修改博客背景并引入动态背景

字体/鼠标

参考【Hugo】Stack主题自定义修改

布局

首页布局调整

代码 在 /assets/scss/custom.scss 中添加:
 1
 2
 3
 4
 5
 6
 7
 8
 9
10
11
12
13
14
/*主页布局间距调整*/
.main-container {
  gap: 50px; //文章宽度

  @include respond(md) {
    padding: 0 30px;
    gap: 40px; //中等屏幕时的文章宽度
  }
}

.related-contents {
  overflow-x: visible; //显示隐藏的图标
  padding-bottom: 15px;
}

页面三栏调整

代码 在 /assets/scss/custom.scss 中添加:
 1
 2
 3
 4
 5
 6
 7
 8
 9
10
11
12
13
14
15
16
17
18
19
20
21
22
23
24
25
26
27
28
29
30
31
32
33
34
35
36
37
38
39
40
41
42
43
44
45
46
47
48
49
50
51
52
53
54
55
56
//页面三栏宽度调整
.container {
  margin-left: auto;
  margin-right: auto;

  .left-sidebar {
    order: -3;
    max-width: var(--left-sidebar-max-width);
  }

  .right-sidebar {
    order: -1;
    max-width: var(--right-sidebar-max-width);

    /// Display right sidebar when min-width: lg
    @include respond(lg) {
      display: flex;
    }
  }

  &.extended {
    @include respond(md) {
      max-width: 1024px;
      --left-sidebar-max-width: 25%;
      --right-sidebar-max-width: 22% !important;
    }

    @include respond(lg) {
      max-width: 1280px;
      --left-sidebar-max-width: 20%;
      --right-sidebar-max-width: 30%;
    }

    @include respond(xl) {
      max-width: 1453px; //1536px;
      --left-sidebar-max-width: 15%;
      --right-sidebar-max-width: 25%;
    }
  }

  &.compact {
    @include respond(md) {
      --left-sidebar-max-width: 25%;
      max-width: 768px;
    }

    @include respond(lg) {
      max-width: 1024px;
      --left-sidebar-max-width: 20%;
    }

    @include respond(xl) {
      max-width: 1280px;
    }
  }
}

归档页双栏

1

代码 在 /assets/scss/custom.scss 中添加:
 1
 2
 3
 4
 5
 6
 7
 8
 9
10
11
12
13
14
15
16
17
18
// 归档页面两栏
@media (min-width: 1024px) {
  .article-list--compact {
    display: grid;
    grid-template-columns: 1fr 1fr;
    background: none;
    box-shadow: none;
    gap: 1rem;

    article {
      background: var(--card-background);
      border: none;
      box-shadow: var(--shadow-l2);
      margin-bottom: 8px;
      border-radius: 16px;
    }
  }
}

友链三栏

1

代码 在 /assets/scss/custom.scss 中添加:
 1
 2
 3
 4
 5
 6
 7
 8
 9
10
11
12
13
14
15
16
17
18
19
20
21
22
// 友情链接三栏
@media (min-width: 1024px) {
  .article-list--compact.links {
    display: grid;
    grid-template-columns: 1fr 1fr 1fr;
    background: none;
    box-shadow: none;
    gap: 1rem;

    article {
      background: var(--card-background);
      border: none;
      box-shadow: var(--shadow-l2);
      margin-bottom: 8px;
      border-radius: var(--card-border-radius);

      &:nth-child(odd) {
        margin-right: 8px;
      }
    }
  }
}

小图片样式

代码 在 /assets/scss/custom.scss 中添加:
1
2
3
4
5
6
7
//全局页面小图片样式微调
.article-list--compact article .article-image img {
  width: var(--image-size);
  height: var(--image-size);
  object-fit: cover;
  border-radius: 17%;
}

间距调整

代码 在 /assets/scss/custom.scss 中添加:
 1
 2
 3
 4
 5
 6
 7
 8
 9
10
11
12
// 全局页面布局间距调整
.main-container {
  min-height: 100vh;
  align-items: flex-start;
  padding: 0 15px;
  gap: var(--section-separation);
  padding-top: var(--main-top-padding);

  @include respond(md) {
    padding: 0 37px;
  }
}

细节

页面基本配色

代码 在 /assets/scss/custom.scss 中添加:
 1
 2
 3
 4
 5
 6
 7
 8
 9
10
11
12
13
14
15
16
17
18
19
20
21
22
23
24
// 页面基本配色
:root {
  // 全局顶部边距
  --main-top-padding: 30px;
  // 全局卡片圆角
  --card-border-radius: 25px;
  // 标签云卡片圆角
  --tag-border-radius: 8px;
  // 卡片间距
  --section-separation: 40px;
  // 全局字体大小
  --article-font-size: 1.8rem;
  // 行内代码背景色
  --code-background-color: #f8f8f8;
  // 行内代码前景色
  --code-text-color: #e96900;
  // 暗色模式下样式
  &[data-scheme="dark"] {
    // 行内代码背景色
    --code-background-color: #ff6d1b17;
    // 行内代码前景色
    --code-text-color: #e96900;
  }
}

归档页增加标签

1

代码 1.在 layouts/_default/archives.html里的/header后添加:
 1
 2
 3
 4
 5
 6
 7
 8
 9
10
11
12
13
14
15
16
17
18
{{- $taxonomy := $.Site.GetPage "taxonomyTerm" "tags" -}}
{{- $terms := $taxonomy.Pages -}}
{{ if $terms }}
<section class="widget tagCloud">
<h2 class="section-title">{{ $taxonomy.Title }}</h2>

    <div class="tagCloud-tags">
        {{ if ne (len $.Site.Taxonomies.tags) 0 }}
            {{ range $name, $taxonomy := $.Site.Taxonomies.tags }}
                {{ $tagCount := len $taxonomy.Pages }}
                <a href="{{ "/tags/" | relURL }}{{ $name | urlize }}" class="tagCloud-tags">
                    {{ $name }}<span class="tagCloud-count">{{ $tagCount }}</span>
                </a>
            {{ end }}
        {{ end }}
    </div>
<section>
{{ end }}
代码 2.在 assets/scss/partials/widgets.scss 中添加:(设置数字颜色)
1
2
3
4
5
.tagCloud {
    .tagCloud-count {
        color: var(--body-text-color);
    }
}

归档页圆角标签

1

代码 1.在 assets/scss/variables.scss 中修改:
1
2
--tag-border-radius: 24px; // Change from 4px to make it round corner
--category-border-radius: 4px; // Add category border setting
代码 2.在 assets/scss/partials/article.scss 中找到.article-category并替换:(调整分类样式)
 1
 2
 3
 4
 5
 6
 7
 8
 9
10
11
12
13
14
15
16
17
18
19
.article-category {
        display: flex;
        flex-wrap: wrap;
        gap: 10px;

        a {
            background: var(--card-background);
            box-shadow: var(--shadow-l1);
            border-radius: var(--category-border-radius);
            padding: 8px 20px;
            color: var(--card-text-color-main);
            font-size: 1.4rem;
            transition: box-shadow 0.3s ease;

            &:hover {
                box-shadow: var(--shadow-l2);
            }
        }
    }
代码 3.在 assets/scss/partials/widgets.scss 中添加:(保留分类样式)
 1
 2
 3
 4
 5
 6
 7
 8
 9
10
11
12
13
14
15
16
17
18
19
20
21
22
23
24
25
26
/* Category widget */
.category {
    .category-label {
        display: flex;
        flex-wrap: wrap;
        gap: 10px;

        a {
            background: var(--card-background);
            box-shadow: var(--shadow-l1);
            border-radius: var(--category-border-radius);
            padding: 8px 20px;
            color: var(--card-text-color-main);
            font-size: 1.4rem;
            transition: box-shadow 0.3s ease;

            &:hover {
                box-shadow: var(--shadow-l2);
            }
        }
    }
    .category-count {
        margin-left: 7px;
        color: var(--body-text-color);
    }
}
代码 4.在 layouts/partials/widget/categories.html 中修改:(显示分类条目数量)
 1
 2
 3
 4
 5
 6
 7
 8
 9
10
11
12
13
14
<section class="widget category">
     <div class="widget-icon">
         {{ partial "helper/icon" "categories" }}
     </div>
     <h2 class="widget-title section-title">{{ T "widget.categoriesCloud.title" }}</h2>

     <div class="category-label">
         {{ range first $limit $context.Site.Taxonomies.categories.ByCount }}
             <a href="{{ .Page.RelPermalink }}" class="font_size_{{ .Count }}">
                 {{ .Page.Title }}<span class="category-count">{{ .Count }}</span>
             </a>
         {{ end }}
     </div>
</section>
代码 5.在 assets/scss/partials/layout/article.scss 中修改:(保留代码的方形copy按钮)
1
2
3
.copyCodeButton {
    border-radius: var(--category-border-radius);
}
代码 6.在 assets/scss/partials/layout/article.scss 中修改:(保留文内的inline代码)
1
2
3
code {
    border-radius: var(--category-border-radius);
}

缩小分类尺寸

1

代码 在 assets/scss/partials/layout/list.scss 中修改数值:
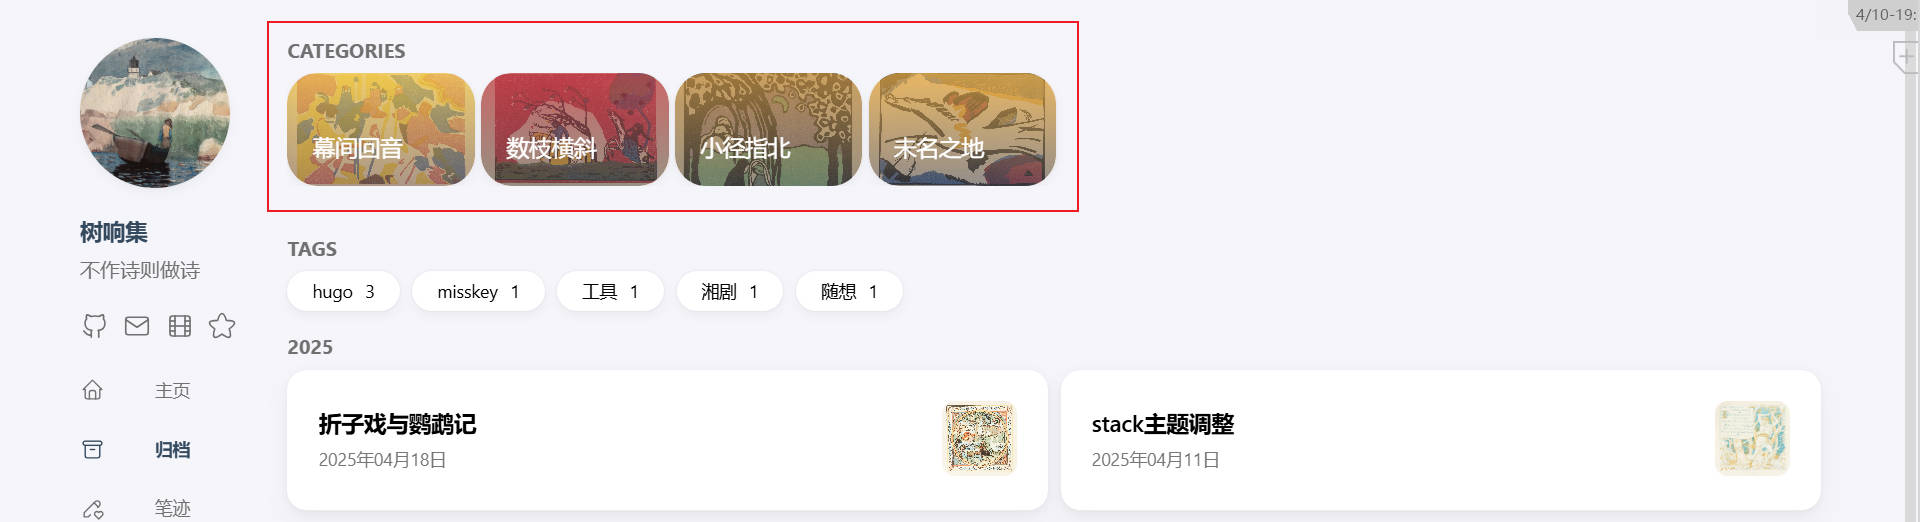
1
2
3
4
5
6
7
8
9
    .article-list--tile {
        display: flex;
        padding-bottom: 0px; // Narrow the spacing

        article {
            width: 150px; // Make category cards smaller
            height: 90px;
            margin-right: 5px; // Make cards spacing narrower
            flex-shrink: 0;

首页分类颜色

1

代码 1.在对应分类文件夹里的 _index.md 文件里定义背景色:
1
2
3
4
5
6
7
8
---
# content/categories/life/_index.md
title: 未名之地
# Badge style
style:
    background: "#d09daa" //就是这个颜色
    color: "#fff"
---
代码 2.在 assets/scss/partials/widgets.scss 里找到.category-label并在如下位置增加border-left设置:
1
2
3
4
5
6
7
8
.category-label {
    display: flex;
    flex-wrap: wrap;
    gap: 10px;

    a {
        border-left: 6px solid; // Set border for category widget
        background: var(--card-background);
代码 3.在 layouts/partials/widget/categories.html 里找到category-label并修改:
1
2
3
4
5
6
7
    <div class="category-label">
        {{ range first $limit $context.Site.Taxonomies.categories.ByCount }}
        <a href="{{ .Page.RelPermalink }}" class="font_size_{{ .Count }}"
            style="border-left-color: {{ .Page.Params.style.background }}; filter:saturate(1.7);"> //filter是高饱和度,不需要可以删
            {{ .Page.Title }}<span class="category-count">{{ .Count }}</span>
        </a>
        {{ end }}

菜单栏圆角

代码 在 /assets/scss/custom.scss 中添加:
 1
 2
 3
 4
 5
 6
 7
 8
 9
10
11
12
13
14
15
16
17
18
19
20
21
22
23
24
25
26
27
28
29
30
31
32
33
34
35
36
37
38
39
40
41
42
43
44
45
46
47
48
49
50
51
52
53
54
55
56
57
58
59
60
61
62
63
64
65
66
67
68
69
70
71
72
73
74
75
76
77
78
79
80
// 菜单栏样式
// 下拉菜单改圆角样式
.menu {
  padding-left: 0;
  list-style: none;
  flex-direction: column;
  overflow-x: hidden;
  overflow-y: scroll;
  flex-grow: 1;
  font-size: 1.6rem;
  background-color: var(--card-background);

  box-shadow: var(--shadow-l2); //改个阴影
  display: none;
  margin: 0; //改为0
  border-radius: 10px; //加个圆角
  padding: 30px 30px;

  @include respond(xl) {
    padding: 15px 0;
  }

  &,
  .menu-bottom-section {
    gap: 30px;

    @include respond(xl) {
      gap: 25px;
    }
  }

  &.show {
    display: flex;
  }

  @include respond(md) {
    align-items: flex-end;
    display: flex;
    background-color: transparent;
    padding: 0;
    box-shadow: none;
    margin: 0;
  }

  li {
    position: relative;
    vertical-align: middle;
    padding: 0;

    @include respond(md) {
      width: 100%;
    }

    svg {
      stroke-width: 1.33;

      width: 20px;
      height: 20px;
    }

    a {
      height: 100%;
      display: inline-flex;
      align-items: center;
      color: var(--body-text-color);
      gap: var(--menu-icon-separation);
    }

    span {
      flex: 1;
    }

    &.current {
      a {
        color: var(--accent-color);
        font-weight: bold;
      }
    }
  }
}

文章封面高度

代码 在 /assets/scss/custom.scss 中添加:
 1
 2
 3
 4
 5
 6
 7
 8
 9
10
11
12
13
14
//文章封面高度更改
.article-list article .article-image img {
  width: 100%;
  height: 150px;
  object-fit: cover;

  @include respond(md) {
    height: 200px;
  }

  @include respond(xl) {
    height: 305px;
  }
}

滚动条样式

代码 在 /assets/scss/custom.scss 中添加:
 1
 2
 3
 4
 5
 6
 7
 8
 9
10
11
12
13
14
15
16
17
18
19
20
21
22
23
24
25
26
27
//将滚动条修改为圆角样式
//菜单滚动条美化
.menu::-webkit-scrollbar {
  display: none;
}

// 全局滚动条美化
html {
  ::-webkit-scrollbar {
    width: 20px;
  }

  ::-webkit-scrollbar-track {
    background-color: transparent;
  }

  ::-webkit-scrollbar-thumb {
    background-color: #d6dee1;
    border-radius: 20px;
    border: 6px solid transparent;
    background-clip: content-box;
  }

  ::-webkit-scrollbar-thumb:hover {
    background-color: #a8bbbf;
  }
}

选中区域背景色

代码 在 /assets/scss/custom.scss 中添加:
 1
 2
 3
 4
 5
 6
 7
 8
 9
10
11
12
13
14
15
16
17
18
19
20
21
22
23
24
25
26
27
// 设置选中字体的区域背景颜色
//修改选中颜色
::selection {
  color: #fff;
  background: #34495e;
}

a {
  text-decoration: none;
  color: var(--accent-color);

  &:hover {
    color: var(--accent-color-darker);
  }

  &.link {
    color: #4288b9ad;
    font-weight: 600;
    padding: 0 2px;
    text-decoration: none;
    cursor: pointer;

    &:hover {
      text-decoration: underline;
    }
  }
}

内容

图片居中

代码 在 /assets/scss/partials/layout/article.scss Line 256 处添加:
1
2
3
4
5
6
7
// Center image from url source
p > img {
    display: block;
    margin: 0 auto;
    max-width: 100%;
    height: auto;
}

图片圆角阴影

代码 在 /assets/scss/custom.scss 中添加:
1
2
3
4
5
6
7
8
// 文章内容图片圆角阴影
.article-page .main-article .article-content {
  img {
    max-width: 96% !important;
    height: auto !important;
    border-radius: 8px;
  }
}

引用块样式

代码 在 /assets/scss/custom.scss 中添加:
 1
 2
 3
 4
 5
 6
 7
 8
 9
10
11
12
13
14
15
16
// 文章内容引用块样式
.article-content {
  blockquote {
    border-left: 6px solid #358b9a1f !important;
    background: #3a97431f;
  }
}

// 修复引用块内容窄页面显示问题
a {
  word-break: break-all;
}

code {
  word-break: break-all;
}

代码块样式

代码 在 /assets/scss/custom.scss 中添加:
 1
 2
 3
 4
 5
 6
 7
 8
 9
10
11
12
13
14
15
16
17
18
19
20
21
22
23
24
25
26
27
28
29
30
31
32
33
34
35
36
37
38
39
// 代码块基础样式修改
.highlight {
  max-width: 102% !important;
  background-color: var(--pre-background-color);
  padding: var(--card-padding);
  position: relative;
  border-radius: 20px;
  margin-left: -7px !important;
  margin-right: -12px;
  box-shadow: var(--shadow-l1) !important;

  &:hover {
    .copyCodeButton {
      opacity: 1;
    }
  }

  // keep Codeblocks LTR
  [dir="rtl"] & {
    direction: ltr;
  }

  pre {
    margin: initial;
    padding: 0;
    margin: 0;
    width: auto;
  }
}

// light模式下的代码块样式调整
[data-scheme="light"] .article-content .highlight {
  background-color: #fff9f3;
}

[data-scheme="light"] .chroma {
  color: #ff6f00;
  background-color: #fff9f3cc;
}

进阶设置

博客运行时间

1

代码 1.在 layouts/partials/footer/custom.html 中添加:
 1
 2
 3
 4
 5
 6
 7
 8
 9
10
11
12
13
14
15
16
17
18
19
20
21
22
23
24
25
26
27
28
29
30
<!-- layouts/partials/footer/custom.html -->
<script>
 let s1 = '2023-3-18'; //website start date
 s1 = new Date(s1.replace(/-/g, "/"));
 let s2 = new Date();

 // Calculate the difference
 let diffInMilliseconds = s2.getTime() - s1.getTime();
 let totalDays = Math.floor(diffInMilliseconds / (1000 * 60 * 60 * 24));

 // Create a new date object starting from the initial date
 let years = s2.getFullYear() - s1.getFullYear();
 let months = s2.getMonth() - s1.getMonth();
 let days = s2.getDate() - s1.getDate();

 // Adjust months and years if necessary
 if (days < 0) {
   months -= 1;
   let prevMonth = new Date(s2.getFullYear(), s2.getMonth(), 0); // Get the last day of the previous month
   days += prevMonth.getDate();
 }
 if (months < 0) {
   years -= 1;
   months += 12;
 }

 // Format the result
 let result = `${years}年${months}月${days}天`;
 document.getElementById('runningdays').innerHTML = result;
</script>

总字数统计

1

代码 1.在 layouts/partials/footer/footer.html 中添加:
 1
 2
 3
 4
 5
 6
 7
 8
 9
10
11
12
13
14
    <!-- Add total page and word count time -->
    <section class="totalcount">
        {{$scratch := newScratch}}
        {{ range (where .Site.Pages "Kind" "page" )}}
        {{$scratch.Add "total" .WordCount}}
        {{ end }}
        {{ $totalWords := $scratch.Get "total" }}
        {{ $tenThousands := div $totalWords 10000 }}
        {{ $remainingThousands := mod (div $totalWords 1000) 10 }}

        发表了{{ len (where .Site.RegularPages "Section" "post") }}篇文章 ·
        总计{{ $tenThousands }}万{{ $remainingThousands }}千字
        <br>
    </section>
代码 2.在 assets/scss/partials/footer.scss 中修改风格:
1
2
3
4
5
.totalcount {
    color: var(--card-text-color-secondary);
    font-weight: normal;
    margin-bottom: 5px;
    }

外部链接后面显示图标

1

代码 在 layouts/_default/_markup/render-link.html 里{{ .Text | safeHTML }}后面添加:
1
2
3
4
5
6
7
8
{{ if strings.HasPrefix .Destination "http" }}
<span style="white-space: nowrap;"><svg width=".7em"
    height=".7em" viewBox="0 0 21 21" xmlns="http://www.w3.org/2000/svg">
    <path d="m13 3l3.293 3.293l-7 7l1.414 1.414l7-7L21 11V3z" fill="currentColor" />
    <path d="M19 19H5V5h7l-2-2H5c-1.103 0-2 .897-2 2v14c0 1.103.897 2 2 2h14c1.103 0 2-.897 2-2v-5l-2-2v7z"
        fill="currentColor">
</svg></span>
{{ end }}

返回顶部按钮

1

代码 1.在 layouts/partials/footer/components/script.html 里添加:
 1
 2
 3
 4
 5
 6
 7
 8
 9
10
11
12
13
14
15
16
17
18
19
20
21
22
23
24
25
26
27
28
29
30
31
<!-- Add back to top button -->
<script>
    function backToTop() {
      document.documentElement.scrollIntoView({
        behavior: 'smooth',
      })
    }
  
    window.onload = function () {
      let scrollTop =
        this.document.documentElement.scrollTop || this.document.body.scrollTop
      let totopBtn = this.document.getElementById('back-to-top')
      if (scrollTop > 0) {
        totopBtn.style.display = 'inline'
      } else {
        totopBtn.style.display = 'none'
      }
    }
  
    window.onscroll = function () {
      let scrollTop =
        this.document.documentElement.scrollTop || this.document.body.scrollTop
      let totopBtn = this.document.getElementById('back-to-top')
      if (scrollTop < 200) {
        totopBtn.style.display = 'none'
      } else {
        totopBtn.style.display = 'inline'
        totopBtn.addEventListener('click', backToTop, false)
      }
    }
  </script>
代码 2.在layouts/partials/footer/custom.html 里添加改按钮颜色background-colorborder-color
 1
 2
 3
 4
 5
 6
 7
 8
 9
10
11
12
13
14
15
16
17
18
19
20
21
22
23
24
25
26
27
28
29
30
31
32
33
34
35
36
37
38
39
40
41
42
43
44
45
46
47
48
49
50
51
52
53
54
55
56
57
58
59
60
61
62
63
64
65
66
67
68
69
70
71
72
73
74
75
76
77
78
79
<!-- Add back to top button -->
<a href="#" id="back-to-top" title="返回顶部"></a>

<!--返回顶部 CSS -->
<style>
  #back-to-top {
    display: none;
    position: fixed;
    bottom: 5px;
    right: 15px;
    width: 40px; /* Reduced size */
    height: 40px; /* Reduced size */
    border-radius: 50%; /* Circular button for modern look */
    background-color: var(--body-background);
    box-shadow: var(--shadow-l2);
    font-size: 20px; /* Adjusted for smaller button */
    text-align: center;
    line-height: 38px; /* Center align arrow */
    cursor: pointer;
    transition:
      transform 0.3s ease,
      background-color 0.3s ease; /* Added smooth interaction */
  }

  #back-to-top:before {
    content: "";
    display: inline-block;
    position: relative;
    transform: rotate(135deg);
    height: 8px; /* Reduced size */
    width: 8px; /* Reduced size */
    border-width: 0 0 2px 2px;
    border-color: var(--back-to-top-color);
    border-style: solid;
  }

  #back-to-top:hover {
    transform: scale(1.1); /* Slightly larger on hover */
    background-color: var(--accent-background); /* Optional hover effect */
  }

  #back-to-top:hover:before {
    border-color: var(--accent-color); /* Change arrow color on hover */
  }

  /* Responsive styles */
  @media screen and (max-width: 768px) {
    #back-to-top {
      bottom: 5px;
      right: var(--container-padding);
      width: 30px; /* Slightly smaller for mobile */
      height: 30px;
      font-size: 16px;
      line-height: 32px;
    }
  }

  @media screen and (min-width: 1024px) {
    #back-to-top {
      bottom: 10px;
      right: 20px;
    }
  }

  @media screen and (min-width: 1280px) {
    #back-to-top {
      bottom: 15px;
      right: 25px;
    }
  }

  @media screen and (min-width: 1536px) {
    #back-to-top {
      bottom: 15px;
      right: 25px;
      /* visibility: hidden; */
    }
  }
</style>

自定义emoji

参考赛博房子装修计划(4)自定义emoji

短代码应用

custom.scss 在 \assets\scss 文件中,新建x.html文件放在 \layouts\shortcodes

使用改成双括号{{}}

文本

高亮标记

我是高亮标记
1
{< mark text="我是高亮标记" >}
代码 在 custom.scss 中添加:
1
2
3
4
//重点标记
mark{
    background: hsla(199, 64%, 63%, 0.696);
}

折叠

点我展开 我是第一段
我是第二段
1
2
3
4
5
<details>
<summary>点我展开</summary>
我是第一段<br>
我是第二段
</details>
代码 新建 detail.html :
1
2
3
4
<details>
    <summary>{{ (.Get 0) | markdownify }}</summary>
    {{ .Inner | markdownify }}
</details>

模糊

blur模糊
换行加空标签

1
<span class="blur">blur模糊<br>换行加空标签</span>
代码 在 custom.scss 中添加:
 1
 2
 3
 4
 5
 6
 7
 8
 9
10
11
//文本高斯模糊
.blur {
    color: transparent;
    text-shadow:0px 0px 8px var(--card-text-color-main)
}
 
.blur:hover {
    color: transparent;
    text-shadow:0px 0px 0px var(--card-text-color-main)
   
}

黑色打码

极其醒目的打码
换行加空标签

1
<span class="shady">极其醒目的打码<br>换行加空标签</span>
代码 在 custom.scss 中添加:
 1
 2
 3
 4
 5
 6
 7
 8
 9
10
11
12
//文本黑幕效果
.shady {
    color:#000;
    font-weight: bold;
    box-shadow: 0px -20px 0px rgba(0,0,0,1) inset; 
    transition: all 0.3s ease;
}
.shady:hover{
   font-weight: bold;
    color:#FFF;
    box-shadow: 0px -20px 0px rgba(0,0,0,1) inset; 
}

抖动

这是基本的摇晃效果。
这个段落有剧烈摇晃效果。
这个段落有慢速摇晃效果。
这个段落有轻微摇晃效果。
这个段落有水平摇晃效果。
这个段落有垂直摇晃效果。
这个段落有旋转摇晃效果。
这个段落有透明度变化摇晃效果。
这个段落有疯狂摇晃效果。
这个段落在悬停时冻结。
这个段落持续摇晃。

 1
 2
 3
 4
 5
 6
 7
 8
 9
10
11
{< shake effect="shake" >}这是基本的摇晃效果。{< /shake >}
{< shake effect="shake-hard" >}这个段落有剧烈摇晃效果。{< /shake >}
{< shake effect="shake-slow" >}这个段落有慢速摇晃效果。{< /shake >}
{< shake effect="shake-little" >}这个段落有轻微摇晃效果。{< /shake >}
{< shake effect="shake-horizontal" >}这个段落有水平摇晃效果。{< /shake >}
{< shake effect="shake-vertical" >}这个段落有垂直摇晃效果。{< /shake >}
{< shake effect="shake-rotate" >}这个段落有旋转摇晃效果。{< /shake >}
{< shake effect="shake-opacity" >}这个段落有透明度变化摇晃效果。{< /shake >}
{< shake effect="shake-crazy" >}这个段落有疯狂摇晃效果。{< /shake >}
{< shake effect="shake-freeze" >}这个段落在悬停时冻结。{< /shake >}
{< shake effect="shake-constant" >}这个段落持续摇晃。{< /shake >}
代码 新建 shake.html :
 1
 2
 3
 4
 5
 6
 7
 8
 9
10
11
12
13
14
15
16
17
<link rel="stylesheet" href="https://cdnjs.cloudflare.com/ajax/libs/csshake/1.5.3/csshake.min.css" />

<div class="shake {{ .Get "effect" }}">{{ .Inner }}</div>

<div class="shake"></div> 
<div class="shake shake-hard"></div> 
<div class="shake shake-slow"></div> 
<div class="shake shake-little"></div> 
<div class="shake shake-horizontal"></div> 
<div class="shake shake-vertical"></div> 
<div class="shake shake-rotate"></div> 
<div class="shake shake-opacity"></div> 
<div class="shake shake-crazy"></div>
<!-- Freeze the animation at that point when :hover --> 
<div class="shake shake-freeze"></div> 
<!-- Continuous animation instead on :hover --> 
<div class="shake shake-constant"></div> 

渐变

抄的美丽配色
换行加空标签
再换行再加

1
<font class="colorfulfont"> 抄的美丽配色<br>换行加空标签<br>再换行再加</font>
代码 在 custom.scss 中添加:
1
2
3
4
5
6
7
//文字颜色渐变
.colorfulfont {
    background: linear-gradient(to right, rgb(25, 221, 238), #ed4588); //第一个颜色代码是渐变起始色,第二个颜色代码是渐变结束色;
    -webkit-background-clip: text;
    background-clip: text;
    color: transparent;
}

键盘样式

Ctrl+Alt+Del

1
<kbd>Ctrl</kbd>+<kbd>Alt</kbd>+<kbd>Del</kbd>
代码 在 custom.scss 中添加:
 1
 2
 3
 4
 5
 6
 7
 8
 9
10
11
12
13
14
//键盘标签样式
kbd {
  margin: 0 .1em;
  padding: .1em .6em;
  font-size: .8em;
  color: #242729;
  background: #fff;
  border: 1px solid #adb3b9;
  border-radius: 3px;
  box-shadow: 0px 1px 0 rgba(12, 13, 14, 0.2), 0 0 0 2px #fff inset;
  white-space: nowrap;
  vertical-align: middle;
  font-family: SourceHanSerifSC;
}

文字位置

文字居左

文字居中

文字居右

1
2
3
{< align left "文字居左" >}
{< align center "文字居中" >}
{< align right "文字居右" >}
代码 新建 align.html :
1
<p style="text-align:{{ index .Params 0 }}">{{ index .Params 1 | markdownify }}</p>

引用

摘抄引用

这里写引用内容,实际使用记得换成双括号。

1
2
3
{< blockquote author="作者" link="也可以不加啦" title="作品名" >}
这里写引用内容
{< /blockquote >}
代码 新建 blockquote.html :
 1
 2
 3
 4
 5
 6
 7
 8
 9
10
11
12
13
14
15
16
17
18
19
20
21
22
23
24
25
26
27
28
29
30
31
32
33
34
35
36
37
38
39
40
41
42
43
44
45
46
47
48
49
50
51
52
53
54
55
56
57
58
59
60
61
62
63
64
65
66
67
<!-- reset scratch variables at the start -->
{{ $.Scratch.Set "bl_author" false }}
{{ $.Scratch.Set "bl_source" false }}
{{ $.Scratch.Set "bl_link" false }}
{{ $.Scratch.Set "bl_title" false }}

{{ if .IsNamedParams }}
  {{ $.Scratch.Set "bl_author" (.Get "author") }}
  {{ $.Scratch.Set "bl_source" (.Get "source") }}
  {{ $.Scratch.Set "bl_link" (.Get "link") }}
  {{ $.Scratch.Set "bl_title" (.Get "title") }}
{{ else }}
  <!-- for the positional version if any -->
{{ end }}

<!-- if title is not set explicitly then we need to beautify the link
     if length of link is more than 32 chars, we will cut it off by 32 and
     then drop everything after the last / if any and put it in into title -->

{{ with $.Scratch.Get "bl_title" }}
  <!-- do nothing -->
{{ else }}
  {{ with $.Scratch.Get "bl_link" }}    <!-- if link is given -->
    {{ range last 1 (split ($.Scratch.Get "bl_link" ) "://") }}  <!-- split by :// and then only take the items after it to remove protocol:// -->
      {{ $.Scratch.Set "title_without_protocol" . }}
    {{ end }}
    {{ range last 1 (split ($.Scratch.Get "title_without_protocol" ) "www.")  }} <!-- also remove the www. at the start if any. we are using a second split because all URLS may not start with it -->
      {{ $.Scratch.Set "title_without_protocol" . }}
    {{ end }}
    {{ $.Scratch.Set "bl_title" ($.Scratch.Get "title_without_protocol") }}

    <!-- if link is longer than 32 bytes we should trim it -->
    {{ if (gt (len ($.Scratch.Get "title_without_protocol") ) 32) }}
      {{ $title := (slicestr ($.Scratch.Get "title_without_protocol") 0 32) }}   <!-- get the first 32 characters of title_without_protocol -->
      {{ $split_by_fw_slash := split $title "/" }}   <!-- now split on / because we want to stop after the last forward slash -->
      {{ $count := (sub (len $split_by_fw_slash) 1) }}   <!-- we want everything but the last part so we adjust the count accordingly -->

      {{ $.Scratch.Set "tempstring" "" }}   <!-- temp variable to hold the concatinated string -->
      {{ range first $count $split_by_fw_slash  }}  <!-- loop through all parts except last and concat them (add / between halves) -->
        {{ $.Scratch.Set "tempstring" ( . | printf "%s%s/" ($.Scratch.Get "tempstring") | printf "%s" ) }}
      {{ end }}
      {{ $.Scratch.Set "bl_title" ( printf "%s..." ($.Scratch.Get "tempstring") | printf "%s" ) }}
    {{ end }}
  {{ end }}
{{ end }}

<blockquote>
  <p>{{ .Inner | markdownify }}</p>
  <footer style="text-align:right">
    <strong>{{ with $.Scratch.Get "bl_author" }}{{ . }}{{ end }}</strong>
    {{ with $.Scratch.Get "bl_source" }}
      <cite>{{ . }}</cite>
    {{ else }}
      {{ with $.Scratch.Get "bl_link" }}
        <cite>
          <a href="{{ . }}" title="{{ . }}" rel="noopener noreferrer">{{ $.Scratch.Get "bl_title" }}</a> <!-- can't have new lines here -->
        </cite>
      {{ else }}
        {{ with $.Scratch.Get "bl_title" }}
          <cite>
            {{ $.Scratch.Get "bl_title" }}</a>
          </cite>
        {{ end }}
      {{ end }}
    {{ end }}
  </footer>
</blockquote>

中心引用

左右两边的符号可以自定义
使用需要双括号
换行需要空标签

1
2
3
{< quote-center >}
左右两边的符号可以自定义<br>使用需要双括号<br>换行需要空标签
{< /quote-center >}
代码 1.新建 quote-center.html :
1
2
3
4
5
6
<blockquote class="quote-center">
  {{- $content := .Inner | markdownify -}} {{- if not (strings.HasPrefix $content "
  <p>") }} {{ printf `</p>
  <p>%s</p>
  ` $content | safeHTML }} {{- else }} {{- $content }} {{- end -}}
</blockquote>
代码 2.在 custom.scss 中添加:
 1
 2
 3
 4
 5
 6
 7
 8
 9
10
11
12
13
14
15
16
17
18
19
20
21
22
23
24
25
26
27
28
29
30
31
// 诗歌引用格式
blockquote.quote-center {
    position: relative;
    border-left: none;
    padding-left: 0;
    border-top: 0px solid var(--card-separator-color);
    border-bottom: 0px solid var(--card-separator-color);
    p {
      text-align: center !important;
      margin-top: 1.5em;
      margin-bottom: 1.5em;
    }
    &::before {
      position: absolute;
      left: 0;
      content: '“----';
      color: #6496c880;
      font-size: 3em;
      font-weight: normal;
      margin-top: -0.72em;
    }
    &::after {
      position: absolute;
      right: 0;
      content: '----”';
      color: #6496c880;
      font-size: 3em;
      font-weight: normal;
      margin-top: -1.42em;
    }
}

特殊格式

评分

1
{< rating 10 7 >}
代码 1.新建 rating.html :
 1
 2
 3
 4
 5
 6
 7
 8
 9
10
11
<span class="star-rating">
    {{- if ge (.Get 0) (.Get 1) -}}
        {{- $star_outline := sub (int (.Get 0)) (int (.Get 1)) -}}
        {{- range $i, $sequence :=  (seq (.Get 1)) -}}
            <i class="star"><svg xmlns="http://www.w3.org/2000/svg" viewBox="0 0 576 512"><path d="M381.2 150.3L524.9 171.5C536.8 173.2 546.8 181.6 550.6 193.1C554.4 204.7 551.3 217.3 542.7 225.9L438.5 328.1L463.1 474.7C465.1 486.7 460.2 498.9 450.2 506C440.3 513.1 427.2 514 416.5 508.3L288.1 439.8L159.8 508.3C149 514 135.9 513.1 126 506C116.1 498.9 111.1 486.7 113.2 474.7L137.8 328.1L33.58 225.9C24.97 217.3 21.91 204.7 25.69 193.1C29.46 181.6 39.43 173.2 51.42 171.5L195 150.3L259.4 17.97C264.7 6.954 275.9-.0391 288.1-.0391C300.4-.0391 311.6 6.954 316.9 17.97L381.2 150.3z"/></svg></i>
        {{- end -}}
        {{- range $i, $sequence :=  (seq $star_outline) -}}
            <i class="star-outline"><svg xmlns="http://www.w3.org/2000/svg" viewBox="0 0 576 512"><path d="M381.2 150.3L524.9 171.5C536.8 173.2 546.8 181.6 550.6 193.1C554.4 204.7 551.3 217.3 542.7 225.9L438.5 328.1L463.1 474.7C465.1 486.7 460.2 498.9 450.2 506C440.3 513.1 427.2 514 416.5 508.3L288.1 439.8L159.8 508.3C149 514 135.9 513.1 126 506C116.1 498.9 111.1 486.7 113.2 474.7L137.8 328.1L33.58 225.9C24.97 217.3 21.91 204.7 25.69 193.1C29.46 181.6 39.43 173.2 51.42 171.5L195 150.3L259.4 17.97C264.7 6.954 275.9-.0391 288.1-.0391C300.4-.0391 311.6 6.954 316.9 17.97L381.2 150.3z"/></svg></i>
        {{- end -}}
    {{- end -}}
</span>
代码 2.在 custom.scss 中添加:
 1
 2
 3
 4
 5
 6
 7
 8
 9
10
11
12
13
//星星评级
i.star{
    color: hsl(61, 79%, 63%); /*星星的颜色*/
  }
  
  i.star-outline{
    color: hsl(211, 31%, 74%);/*空星星的颜色*/
  }
  
  i.star svg, i.star-outline svg{
    width: 20px;
    fill: currentColor;
}

系列文章

1


代码 1.在对应文章的 front matter 中添加:
1
2
series = ["建站"]
series_order = 1
代码 2.在 layouts/shortcodes/seriesbox.html 中添加:
 1
 2
 3
 4
 5
 6
 7
 8
 9
10
11
12
13
14
15
16
17
18
19
20
21
22
{{ $series := index .Page.Params.series 0 }}
{{ if $series }}
  {{ $pages := where site.RegularPages "Params.series" "intersect" (slice $series) }}
  {{ $pages = where $pages ".Params.series_order" "!=" nil }}
  {{ $pages = sort $pages "Params.series_order" }}
  {{ if gt (len $pages) 1 }}
    <details class="series-box" open>
      <summary class="series-title">
        本文属于 <strong>{{ $series }}</strong> 系列
      </summary>
      <ol class="series-list">
        {{ range $pages }}
          <li>
            <a href="{{ .RelPermalink }}" class="{{ if eq $.Page.Permalink .Permalink }}active{{ end }}">
              {{ printf "§ %d: %s" .Params.series_order .Title }}
            </a>
          </li>
        {{ end }}
      </ol>
    </details>
  {{ end }}
{{ end }}
代码 3在 custom.scss 中添加:
 1
 2
 3
 4
 5
 6
 7
 8
 9
10
11
12
13
14
15
16
17
18
19
20
21
22
23
24
25
26
27
28
29
30
31
32
33
34
35
36
37
// series
.series-box {
  background: var(--card-background);
  border-radius: 0.5rem;
  padding: 1rem;
  margin: 2rem 0;
  box-shadow: var(--shadow-l1);
  color: var(--card-text-color-main);
}

.series-box summary,
.series-box .series-title {
  color: var(--body-text-color);
  font-weight: 600;
  margin-bottom: 0.75rem;
  cursor: pointer;
}

.series-box ol.series-list {
  padding-left: 1.25rem;
  margin: 0.5rem 0 0 0;
}

.series-box li {
  margin: 0.25rem 0;
  list-style: none;
}

.series-box a {
  color: var(--card-text-color-main);
  text-decoration: none;
}

.series-box a.active {
  font-weight: bold;
  color: var(--accent-color);
}

卡片链接

可以在这里插入链接假装是卡片式链接。
好像不能插入图片?
换行需要空标签。实际使用需要双括号。
1
2
3
{< card >}
可以在这里插入链接假装是卡片式链接。<br>好像不能插入图片?<br>换行需要空标签。实际使用需要双括号。
{< /card >}
代码 1.新建 card.html :
1
2
3
4
5
6
{{- $raw := (markdownify .Inner | chomp) -}} {{- $block := findRE
    "(?is)^<(?:address|article|aside|blockquote|canvas|dd|div|dl|dt|fieldset|figcaption|figure|footer|form|h(?:1|2|3|4|5|6)|header|hgroup|hr|li|main|nav|noscript|ol|output|p|pre|section|table|tfoot|ul|video)\\b"
    $raw 1 -}}
    <div class="mycard">
      <div class="content">{{- if or $block (not $raw) }}{{ $raw }}{{ else }} {{ $raw }} {{ end -}}</div>
    </div>
代码 2.在 custom.scss 中添加:
 1
 2
 3
 4
 5
 6
 7
 8
 9
10
11
12
// 卡片样式
.mycard {
    padding: 10px 20px;
    margin: 20px 0;
    border-radius: 4px;
    word-break: break-all;
    background: #d2e5eb14;
    box-shadow: 0 6px 10px 0 #00000033;
    .content {
      line-height: 30px;
    }
}

时间轴

2025-04-01
试试
新建博客
成功了好耶!
1
{< timeline date="2025-04-01" title="新建博客" description="成功了好耶!" tags="试试"  >}
代码 新建 timeline.html :
  1
  2
  3
  4
  5
  6
  7
  8
  9
 10
 11
 12
 13
 14
 15
 16
 17
 18
 19
 20
 21
 22
 23
 24
 25
 26
 27
 28
 29
 30
 31
 32
 33
 34
 35
 36
 37
 38
 39
 40
 41
 42
 43
 44
 45
 46
 47
 48
 49
 50
 51
 52
 53
 54
 55
 56
 57
 58
 59
 60
 61
 62
 63
 64
 65
 66
 67
 68
 69
 70
 71
 72
 73
 74
 75
 76
 77
 78
 79
 80
 81
 82
 83
 84
 85
 86
 87
 88
 89
 90
 91
 92
 93
 94
 95
 96
 97
 98
 99
100
101
102
103
104
105
106
107
108
109
110
111
112
113
114
115
116
117
118
119
120
121
122
123
124
125
126
127
128
129
130
131
132
133
134
135
136
137
138
139
140
141
142
143
144
145
146
147
148
149
150
151
152
153
154
155
156
157
158
159
160
161
162
163
164
165
166
167
168
169
170
171
172
173
174
{{- $date := .Get "date" -}} {{- $title := .Get "title" -}} {{- $description := .Get "description" -}} {{- $tags := .Get "tags" -}}

<div class="timeline__row">
    <div class="timeline__time">
        <div class="timeline__time">{{ $date }}</div>
        <div class="timeline__split-line"></div>
    </div>
    <div class="timeline__content">
        <div class="timeline__tags">
            {{- with split $tags ", " -}} {{- range . }}{{- if eq . "样式" }}
            <span class="timeline__tag timeline__tag-style">{{ . }}</span> {{- else if eq . "文章" }}
            <span class="timeline__tag timeline__tag-article">{{ . }}</span> {{- else if eq . "页面" }}
            <span class="timeline__tag timeline__tag-page">{{ . }}</span> {{- else }}
            <span class="timeline__tag">{{ . }}</span> {{- end }} {{- end }} {{- end }}
        </div>
            <div class="timeline__title">{{ $title }}</div>
        <div class="timeline__description">
            {{ $description }}
        </div>
    </div>
</div>

<style>
    .timeline {
        display: flex;
        flex-direction: column;
    }
    
    .timeline__row {
        display: flex;
        padding-left: 4%;
        height: 90px;
    }
    
    .timeline__time {
        flex: 0 0 110px;
        color: #5d5d5d;
        font-size: 17px;
        text-transform: uppercase;
        position: relative;
        display: flex;
        flex-direction: column;
        align-items: center;
        padding: 0.5rem 0;
    }
    
    .timeline__time-text {
        margin: 0;
    }
    
    .timeline__split-line {
        position: absolute;
        top: 0.5rem;
        right: -20px;
        height: 100%;
        width: 2px;
        background-color: #84c4e240;
        z-index: 0;
    }
    
    .timeline__split-line:before {
        content: "";
        position: absolute;
        top: 24%;
        right: -4px;
        transform: translateY(-50%);
        width: 10px;
        height: 10px;
        background-color: #c9e5f2;
        box-shadow: 0 0 0 4px var(--theme);
        border-radius: 50%;
        border: 0px solid #84c4e2;
        z-index: -1;
    }
    
    .timeline__content {
        flex: 1;
        margin-left: 4.5rem;
        padding: 0.5rem 0 1.2rem 0;
    }
    
    .timeline__title {
        margin: 0;
        margin-bottom: 2px;
        padding-top: 3px;
        margin-left: 0.5rem;
        color: var(--content);
        font-family: var(--font-family-teshu);
        font-size: 19px;
        font-weight: 600;
        width: fit-content;
        display: inline-block;
        vertical-align: middle;
        /* 垂直居中对齐 */
    }
    
    .timeline__tags {
        display: inline-block;
        padding: 0;
        margin-left: 0.3rem;
        align-items: center;
        gap: 0.3rem;
    }
    
    .timeline__tag {
        display: inline-block;
        color: var(--secondary);
        background-color: #84c4e230;
        border: 1.5px solid #84c4e230;
        border-radius: 999px;
        padding: 0rem 0.5rem;
        font-size: 12px;
        white-space: nowrap;
        line-height: 1.4rem;
        opacity: 0.8;
        vertical-align: middle;
        /* 垂直居中对齐 */
    }
    
    .timeline__description {
        font-size: 15px;
        line-height: 1.6;
        color: #5d5d5d;
        overflow: hidden;
        text-overflow: ellipsis;
        margin: 0.5rem 0 0.4rem 1.5rem;
        /* 添加 1.5rem 的左侧内边距 */
    }
    /* 为类名为 "timeline__tag-style" 的标签定义颜色 */
    
    .timeline__tag-style {
        background-color: #c581da;
        /* 替换为你希望的颜色 */
        border-color: #c581da;
        /* 与背景色相同或不同,根据需要自定义 */
        color: #FFFFFF;
        /* 根据需要选择文本颜色 */
    }
    /* 为类名为 "timeline__tag-article" 的标签定义颜色 */
    
    .timeline__tag-article {
        background-color: #92d392;
        /* 替换为你希望的颜色 */
        border-color: #92d392;
        /* 与背景色相同或不同,根据需要自定义 */
        color: #000000;
        /* 根据需要选择文本颜色 */
    }
    /* 为类名为 "timeline__tag-page" 的标签定义颜色 */
    
    .timeline__tag-page {
        background-color: #707070;
        /* 替换为你希望的颜色 */
        border-color: #707070;
        /* 与背景色相同或不同,根据需要自定义 */
        color: #FFFFFF;
        /* 根据需要选择文本颜色 */
    }
    
    @media screen and (max-width: 768px) {
        .timeline__time {
            font-size: 14px;
            /* 在小屏幕上使用较小的字体大小 */
        }
        .timeline__title {
            font-size: 16px;
            /* 在小屏幕上使用较小的字体大小 */
        }
        .timeline__description {
            font-size: 14px;
            /* 在小屏幕上使用较小的字体大小 */
        }
    }
</style>

对话框

速速 2025-04-01 早上好
Image
gpt 2025-04-01 fine
Image
1
2
{< message from="self" accountID="twitter/昵称" images="1.jpg" timestamp="2025-04-01" name="速速" >}}早上好 {< /message >}
{< message accountID="twitter/昵称" images="1.jpg" timestamp="2025-04-01" name="gpt" >}fine {< /message >}}
代码 1.新建 message.html :
 1
 2
 3
 4
 5
 6
 7
 8
 9
10
11
12
13
14
15
16
17
18
19
20
21
22
23
24
25
<link rel="stylesheet" href="/css/message.css" />

<div class="message {{if eq (.Get "from") "self"}}--self{{end}}">
    <div class="message__inner">
        {{if ne (.Get "accountID") ""}}
        <img class="avatar" src="https://unavatar.io/{{.Get "accountID"}}" width="24" height="24">
        {{else}}
        <img class="avatar" src="" width="24" height="24" style="visibility:hidden;">
        {{end}}
        <div class="message__text">
            <hstack class="message__meta">{{.Get "name"}} <spacer></spacer> {{.Get "timestamp"}}</hstack>
            {{.Inner}}

            {{if ne (.Get "images") ""}}
            <div class="grid-container">
                {{range split (.Get "images") ","}}
                <div class="grid-item">
                    <img class="message__img" src="{{.}}" alt="Image">
                </div>
                {{end}}
            </div>
            {{end}}
        </div>
    </div>
</div>
代码 2.在 custom.scss 中添加:
  1
  2
  3
  4
  5
  6
  7
  8
  9
 10
 11
 12
 13
 14
 15
 16
 17
 18
 19
 20
 21
 22
 23
 24
 25
 26
 27
 28
 29
 30
 31
 32
 33
 34
 35
 36
 37
 38
 39
 40
 41
 42
 43
 44
 45
 46
 47
 48
 49
 50
 51
 52
 53
 54
 55
 56
 57
 58
 59
 60
 61
 62
 63
 64
 65
 66
 67
 68
 69
 70
 71
 72
 73
 74
 75
 76
 77
 78
 79
 80
 81
 82
 83
 84
 85
 86
 87
 88
 89
 90
 91
 92
 93
 94
 95
 96
 97
 98
 99
100
101
102
103
104
105
106
107
108
109
110
111
112
113
114
115
116
117
118
119
120
121
122
123
124
125
126
127
128
129
130
131
132
133
134
135
136
137
138
//对话框
.message {
  font-size: 16px;
  width: 80%;
  margin: 1rem 0;
  text-align: right;
}

.message.--self .message__text {
  background-color: var(--card-background);
  border: 1px solid #b7d8d865;
}

.dark .message.--self .message__text {
  background-color: var(--card-background);
  border: 1px solid #b7dddd15;
  }

.message.--self .message__text {
  text-align: left;
}

.message.--self .message__meta {
  text-align: right;
}


.message:not(.--self) {
  text-align: left;
}

.message__inner {
  display: flex;
  align-items: center;
  justify-content: flex-end;
  align-items: flex-end;
}

.message__inner img {
  order: 1;
}

.message:not(.--self) .message__inner {
  justify-content: flex-start;
}

.message:not(.--self) .message__inner img {
  order: 0;
}

.message__text {
  margin-left: 8px;
  display: flex;
  flex-direction: column;
  gap: 4px;
  border: 1px solid var(--border);
  border-radius: var(--radius);
  padding: 12px;
  margin-right: 8px;
  --list-opacity: 1;
  background-color: var(--card-background);
}

.dark .message__text {
  border: 1px solid var(--border);
  background: var(--card-background);
}

.message__meta {
  color: #888;
  font-size: 0.8em;
}

.message.--self {
  margin-left: auto;
}

.message:not(.--self) {
  margin-right: auto;
}

.grid-container {
  display: grid;
  grid-template-columns: repeat(3, 1fr);
  grid-gap: 10px;
}

.grid-item {
  width: 100%;
  height: 0;
  padding-bottom: 100%;
  position: relative;
}

.grid-item .message__img {
  object-fit: cover;
  position: absolute;
  width: 100%;
  height: 100%;
  border-radius: 8px;
}

.fullsize {
  object-fit: contain;
  max-width: 100%;
  max-height: 100%;
}

img.avatar{
  position: relative;
  width: 24px;
  height: 24px;
  overflow: hidden;
  border-radius: 12px;
  box-shadow: inset 0 0 0 1px rgba(105, 105, 105, 0.1);
  flex-shrink: 0;
  margin:unset !important;
}

img.message__img.medium-zoom-image.medium-zoom-image--opened {
  object-fit: contain;
  position: absolute;
  width: 100%;
  height: 100%;
  border: unset;
  box-shadow: unset;
}

img.message__img {
  margin: unset !important;
}

/* 定义手机端样式 */
@media screen and (max-width: 768px) {
  .message {
      width: 90%;
  }
}

聊天气泡

John Doe   2023-09-12 14:30
这是左边的消息内容。
2023-09-12 14:45   Alice
这是右边的消息内容,测试长长长长长长长长长长长长长长长长长长长长长长长长度。
1
2
3
4
5
6
7
{< chat position="left" name="John Doe" timestamp="2023-09-12 14:30">}
这是左边的消息内容。
{< /chat >}

{< chat position="right" name="Alice" timestamp="2023-09-12 14:45" >}
这是右边的消息内容,测试长长长长长长长长长长长长长长长长长长长长长长长长度。
{< /chat >}
代码 新建 /layouts/shortcodes/chat.html:
  1
  2
  3
  4
  5
  6
  7
  8
  9
 10
 11
 12
 13
 14
 15
 16
 17
 18
 19
 20
 21
 22
 23
 24
 25
 26
 27
 28
 29
 30
 31
 32
 33
 34
 35
 36
 37
 38
 39
 40
 41
 42
 43
 44
 45
 46
 47
 48
 49
 50
 51
 52
 53
 54
 55
 56
 57
 58
 59
 60
 61
 62
 63
 64
 65
 66
 67
 68
 69
 70
 71
 72
 73
 74
 75
 76
 77
 78
 79
 80
 81
 82
 83
 84
 85
 86
 87
 88
 89
 90
 91
 92
 93
 94
 95
 96
 97
 98
 99
100
101
102
103
104
105
106
107
108
109
110
111
112
113
114
115
116
  {{ if eq (.Get "position") "left" }}
<div class="chat --other">
    <div class="chat__inner">
        <div class="chat__meta">{{ .Get "name" }}&nbsp;&nbsp;&nbsp;{{ .Get "timestamp" }}</div>
        <div class="chat__text">
            {{ .Inner }}
        </div>
    </div>
</div>
{{ else if eq (.Get "position") "right" }}
<div class="chat --self">
    <div class="chat__inner">
        <div class="chat__meta" style="text-align: right;">{{ .Get "timestamp" }}&nbsp;&nbsp;&nbsp;{{ .Get "name" }}</div>
        <div class="chat__text">
            {{ .Inner }}
        </div>
    </div>
</div>
{{ end }}

<style>
    .chat {
        margin: 10px;
        padding: 10px;
        position: relative;
        /* 添加相对定位,以便定位尖角箭头 */
        transition: transform 0.2s;
        /* 添加过渡效果,使放大平滑 */
        max-width: 80%;
        min-width: 15%;
    }
    
    .chat:hover {
        transform: scale(1.05);
    }
    
    .chat.--self {
        text-align: left;
        background-color: #ecf5ff;
        color: #000000;
        border-radius: 15px;
        width: fit-content;
        margin-left: auto;
    }
    /* 尖角箭头 */
    
    .chat.--self::before {
        content: "";
        position: absolute;
        right: -18px;
        /* 调整箭头位置 */
        bottom: 5px;
        transform: translateY(-50%);
        border-width: 15px 0 0 20px;
        border-style: solid;
        border-color: transparent transparent transparent #ecf5ff;
        /* 箭头颜色与对话框背景颜色一致 */
    }
    /* 左边对话框样式 */
    
    .chat.--other {
        text-align: left;
        background-color: #ffecec;
        color: #333;
        border-radius: 15px;
        position: relative;
        width: fit-content;
    }
    /* 左边对话框的尖角箭头 */
    
    .chat.--other::before {
        content: "";
        position: absolute;
        left: -18px;
        bottom: 5px;
        transform: translateY(-50%);
        border-width: 15px 20px 0 0;
        border-style: solid;
        border-color: transparent #ffecec transparent transparent;
    }
    /* 消息元数据样式(名称和时间戳) */
    
    .chat__meta {
        font-weight: bold;
        font-size: 0.67em;
        color: #707070;
        margin-bottom: 5px;
    }
    /* 消息文本样式 */
    
    .chat__text {
        font-size: 0.9em;
        margin-left: 10px;
        word-break: break-all;
    }
    
    [data-scheme="dark"] {
        .chat.--self {
            color: #fefefe;
            background-color: #253958;
        }
        .chat.--self::before {
            border-color: transparent transparent transparent #253958;
        }
        .chat.--other {
            color: #fefefe;
            background-color: #1a1a1a;
        }
        .chat.--other::before {
            border-color: transparent #1a1a1a transparent transparent;
        }
        .chat__meta {
            color: #b1b1b1;
        }
    }
</style>
代码 2.在 custom.scss 中添加:
 1
 2
 3
 4
 5
 6
 7
 8
 9
10
11
12
13
14
15
16
17
18
19
20
21
22
23
24
25
26
27
28
29
30
31
32
33
34
35
36
37
38
39
40
41
42
43
44
45
46
47
48
49
50
51
52
53
54
55
56
57
58
59
60
61
62
63
64
65
66
67
68
69
70
71
72
73
74
75
76
77
// notice 短代码
.notice {
    position:relative;
    padding: 1em 1em 1em 2.5em;
    margin-bottom: 1em;
    border-radius: 4px;
    p:last-child {
        margin-bottom: 0;
    }
    .notice-title {
        position: absolute;
        left: 0.8em;
        .notice-icon {
            width: 1.2em;
            height: 1.2em;
        }
    }
    &.notice-warning {
        background: hsla(0, 65%, 65%, 0.15);
        border-left: 5px solid hsl(0, 65%, 65%);
        .notice-title {
            color: hsl(0, 65%, 65%);
        }
    }
    &.notice-info {
        background: hsla(30, 80%, 70%, 0.15);
        border-left: 5px solid hsl(30, 80%, 70%);
        .notice-title {
            color: hsl(30, 80%, 70%);
        }
    }
    &.notice-note {
        background: hsla(200, 65%, 65%, 0.15);
        border-left: 5px solid hsl(200, 65%, 65%);
        .notice-title {
            color: hsl(200, 65%, 65%);
        }
    }
    &.notice-tip {
        background: hsla(140, 65%, 65%, 0.15);
        border-left: 5px solid hsl(140, 65%, 65%);
        .notice-title {
            color: hsl(140, 65%, 65%);
        }
    }
}

[data-theme="dark"] .notice {
    &.notice-warning {
        background: hsla(0, 25%, 35%, 0.15);
        border-left: 5px solid hsl(0, 25%, 35%);
        .notice-title {
            color: hsl(0, 25%, 35%);
        }
    }
    &.notice-info {
        background: hsla(30, 25%, 35%, 0.15);
        border-left: 5px solid hsl(30, 25%, 35%);
        .notice-title {
            color: hsl(30, 25%, 35%);
        }
    }
    &.notice-note {
        background: hsla(200, 25%, 35%, 0.15);
        border-left: 5px solid hsl(200, 25%, 35%);
        .notice-title {
            color: hsl(200, 25%, 35%);
        }
    }
    &.notice-tip {
        background: hsla(140, 25%, 35%, 0.15);
        border-left: 5px solid hsl(140, 25%, 35%);
        .notice-title {
            color: hsl(140, 25%, 35%);
        }
    }
}

neodb

1
{< neodb "NeoDB 网址/豆瓣网址" >}
代码 1.在 /layouts/shortcodes/neodb.html 中添加:
代码 2.在 /assets/scss/custom.scss 中添加:
1
 

misskey

直接复制帖子生成的嵌入代码

B站

1
{< bilibili BV1V7411d7iW 0 1 >} //BV号,0/1为是否自动播放,分p数;使用记得双括号
代码 新建 bilibili.html :
 1
 2
 3
 4
 5
 6
 7
 8
 9
10
11
12
13
14
15
16
17
18
19
20
21
22
23
{{ $vid := (.Get 0) }}
{{ $videopage := default 1 (.Get 1) }}
{{ $basicQuery := querify "page" $videopage "high_quality" 1 "as_wide" 1 }}
{{ $videoQuery := "" }}

{{ if strings.HasPrefix (lower $vid) "av" }}
    {{ $videoQuery = querify "aid" (strings.TrimPrefix "av" (lower $vid)) }}
{{ else if strings.HasPrefix (lower $vid) "bv" }}
    {{ $videoQuery = querify "bvid" $vid }}
{{ else }}
    <p>Bilibili 视频av号或BV号错误!请检查视频av号或BV号是否正确</p>
    <p>当前视频av或BV号:{{ $vid }},视频分P:{{ $videopage }}</p>
{{ end }}

<div class="video-wrapper">
    <iframe src="https://player.bilibili.com/player.html?{{ $basicQuery | safeURL }}&{{ $videoQuery | safeURL }}"
            scrolling="no"
            frameborder="no"
            framespacing="0"
            allowfullscreen="true"
    >
    </iframe>
</div>

调色盘

1
{< swatches "#537d5d" "#73946b" "#9ebc8a" >}
代码 1.新建 layouts/shortcodes/swatches.html:
1
2
3
4
5
  <div class="swatches-container">
    {{ range .Params }}
      <div class="swatch" style="background-color: {{ . }}" title="{{ . }}"></div>
    {{ end }}
  </div>
代码 2.在 custom.scss 中添加:
 1
 2
 3
 4
 5
 6
 7
 8
 9
10
11
12
// 调色盘
.swatches-container {
  display: flex;
  gap: 1rem;
  margin: 1.5rem 0;
}

.swatch {
  flex: 1 1 0;
  height: 3rem;
  border-radius: 0.5rem;
}

图片轮播

1
{< imgloop "1,2,3" >}
代码 1.新建 imgloop.html :
 1
 2
 3
 4
 5
 6
 7
 8
 9
10
11
12
13
14
15
16
17
18
19
20
21
22
23
24
25
26
27
28
29
30
31
32
33
34
35
36
37
38
{{ if .Site.Params.enableimgloop }}
    <link rel="stylesheet" href="https://cdnjs.cloudflare.com/ajax/libs/Swiper/3.4.2/css/swiper.min.css">
    <!-- Swiper -->
    <div class="swiper-container">
        <div class="swiper-wrapper">
            {{$itItems := split (.Get 0) ","}}
            {{range $itItems }}
            <div class="swiper-slide">
                <img src="{{.}}" alt="">
            </div>
            {{end}}
        </div>
        <!-- Add Pagination -->
        <div class="swiper-pagination"></div>
    </div>

    <script src="https://cdnjs.cloudflare.com/ajax/libs/Swiper/3.4.2/js/swiper.min.js"></script>
     <!-- Initialize Swiper -->
     <script>
        var swiper = new Swiper('.swiper-container', {
            pagination: '.swiper-pagination',
            paginationClickable: true,
        //自动调节高度
        autoHeight: true,
        //键盘左右方向键控制
        keyboardControl : true,
        //鼠标滑轮控制
        mousewheelControl : true,
        //自动切换
        //autoplay : 5000,
        //懒加载
        lazyLoading : true,
		lazyLoadingInPrevNext : true,
		//无限循环
		loop : true,
        });
        </script>
{{ end }}
代码 2.在 custom.scss 中添加:
 1
 2
 3
 4
 5
 6
 7
 8
 9
10
11
12
13
14
15
16
17
//图片轮播
.swiper-container {
    max-width: 820px;
    margin: 2em auto;
}
.swiper-slide {
    text-align: center;
    font-size: 18px;
    background-color: #fff;
    /* Center slide text vertically */
    display: flex;
    justify-content: center;
    align-items: center;
    img {
        margin: 0 !important;
    }
}

多图排版

123

1
![1](1.jpg)![2](2.jpg)![3](3.jpg)
代码 在 custom.scss 中添加:
1
2
3
4
5
6
7
.post-content p:has(> img:nth-child(2)){column-count:2;column-gap:8px;margin:6px 0;}
.post-content p:has(> img:nth-child(3)){column-count:3;}
.post-content p:has(> img:nth-child(4)){column-count:4;}
.post-content p:has(> img:nth-child(5)){column-count:5;}
.post-content p:has(> img:nth-child(6)){column-count:4;}
.post-content p:has(> img:nth-child(2)) img{display:inherit;}
.post-content p:has(> img:nth-child(6)) img{margin-bottom:8px;}

小技巧

跳转

跳转地址

点击跳转

1
2
3
<span id="big">跳转地址</span>

<span><a href="#big" style="text-decoration: underline;">点击跳转</a></span>

特别感谢

以上内容参考了下列博文:

Licensed under CC BY-NC-SA 4.0
本博客已稳定运行
发表了6篇文章 · 总计1万8千字
使用 Hugo 构建
主题 StackJimmy 设计